

Restoring an expired domain and getting a static HTML site back online is only the first step. Converting that restored PBN site from HTML to WordPress gives you a manageable content platform, easier internal linking, and a more natural-looking web presence — all of which matter when you are building a private blog network intended to pass link equity to your target pages. This guide walks through the full migration process, from preparing your HTML files to configuring WordPress so the converted site behaves like an established, content-rich domain rather than a freshly installed CMS.
Key Takeaways
- Migrating a restored HTML PBN site to WordPress involves transferring content, recreating URL structures, and configuring permalinks before publishing any outbound links.
- Preserving the original URL paths from the HTML site helps maintain any residual crawl history and avoids unnecessary redirect chains that can dilute link equity.
- WordPress configuration choices — theme, plugins, hosting environment, and metadata — affect how the converted PBN site appears to crawlers and whether it reads as a coherent, topically relevant domain.
- Indexing the converted site before placing outbound links gives search engine crawlers time to associate the domain with its content, which may improve the value of placements made afterward.
- Quality of the converted site — content depth, topical relevance, and clean technical setup — remains the primary factor in whether the PBN placement delivers meaningful link equity to the target page.
Why Convert a Restored HTML PBN Site to WordPress?
A restored HTML site recovered from the Wayback Machine or a similar archive gives you a domain with existing content and a crawl history, but static HTML is difficult to maintain and expand. WordPress makes it straightforward to add new posts, manage internal links, adjust metadata, and keep the site active over time — all of which contribute to a more convincing and sustainable PBN asset. A site that receives occasional new content and has a logical navigation structure is less likely to appear dormant or thin compared to a static HTML installation that never changes after the initial restore.
WordPress also gives you granular control over permalink structures, canonical tags, robots directives, and XML sitemaps through widely available plugins. These controls matter during a PBN migration because you need to replicate the original URL paths as closely as possible, manage how the site is indexed, and ensure that the outbound links you eventually place are surrounded by relevant, crawlable content. Static HTML offers none of this flexibility without manual file editing on every page.
Before You Begin: Preparing the Restored HTML Files
Before installing WordPress, audit the HTML files you recovered from the archive. Identify every page that contains meaningful content — articles, category pages, and any supporting pages such as About or Contact — and note the exact URL path for each one. You will need to recreate these paths in WordPress to avoid broken links and to preserve whatever crawl equity the domain accumulated before it expired. A simple spreadsheet listing the original URL, the page title, and the main body content is enough to guide the migration.
Check the recovered HTML for archive-specific artifacts. Pages pulled from the Wayback Machine often contain Wayback Machine toolbar scripts, banner injections, or absolute links pointing back to web.archive.org. Remove all of these before transferring content to WordPress. Leaving archive scripts in place can cause crawlers to follow external links to the archive rather than staying on your domain, and it creates an obvious footprint that the content was machine-recovered rather than originally produced on the current installation.
Also review the recovered content for topical consistency. The domain’s historical relevance to a specific niche is one of the reasons you selected it for your private blog network. If the archived pages cover a coherent topic, preserve that focus when you build out the WordPress site. If the archive contains a mix of unrelated content, prioritize the pages most relevant to the niche you intend to target with your outbound links.
Installing WordPress and Choosing a Suitable Theme
Install WordPress on the same hosting environment where the domain is pointed. For a PBN asset, the hosting setup should be independent from other sites in your network — separate hosting accounts, IP ranges, and nameservers reduce the likelihood of a shared infrastructure footprint. WordPress installation itself is straightforward through most hosting control panels, but the configuration choices you make immediately after installation have a significant effect on how the converted site presents to crawlers.
Choose a lightweight, clean theme that matches the general style of the original HTML site where possible. A theme that closely resembles the archived site’s layout reinforces topical continuity and avoids the jarring contrast between a historically indexed domain and a visually unrelated new CMS installation. Avoid themes with excessive JavaScript, large external font libraries, or unnecessary third-party calls that slow page load times or create additional external dependencies visible in the page source.
Set the site title and tagline in WordPress Settings to reflect the domain’s historical topic rather than leaving the default “Just another WordPress site” tagline in place. This is a minor but visible signal in page metadata and in the WordPress generator tag, which some crawlers read. If you prefer not to broadcast that the site runs on WordPress, a plugin or a small addition to the theme’s functions.php file can remove the generator meta tag from the HTML output.
Recreating URL Structures and Configuring Permalinks
Permalink configuration is one of the most important steps in converting a restored HTML PBN site to WordPress. The original HTML site had URLs structured as static file paths, such as /category/article-name.html or simply /article-name/. WordPress defaults to a query-string format that looks nothing like these paths. Before you publish any content, go to Settings → Permalinks in the WordPress dashboard and choose a structure that matches the original URL pattern as closely as possible.
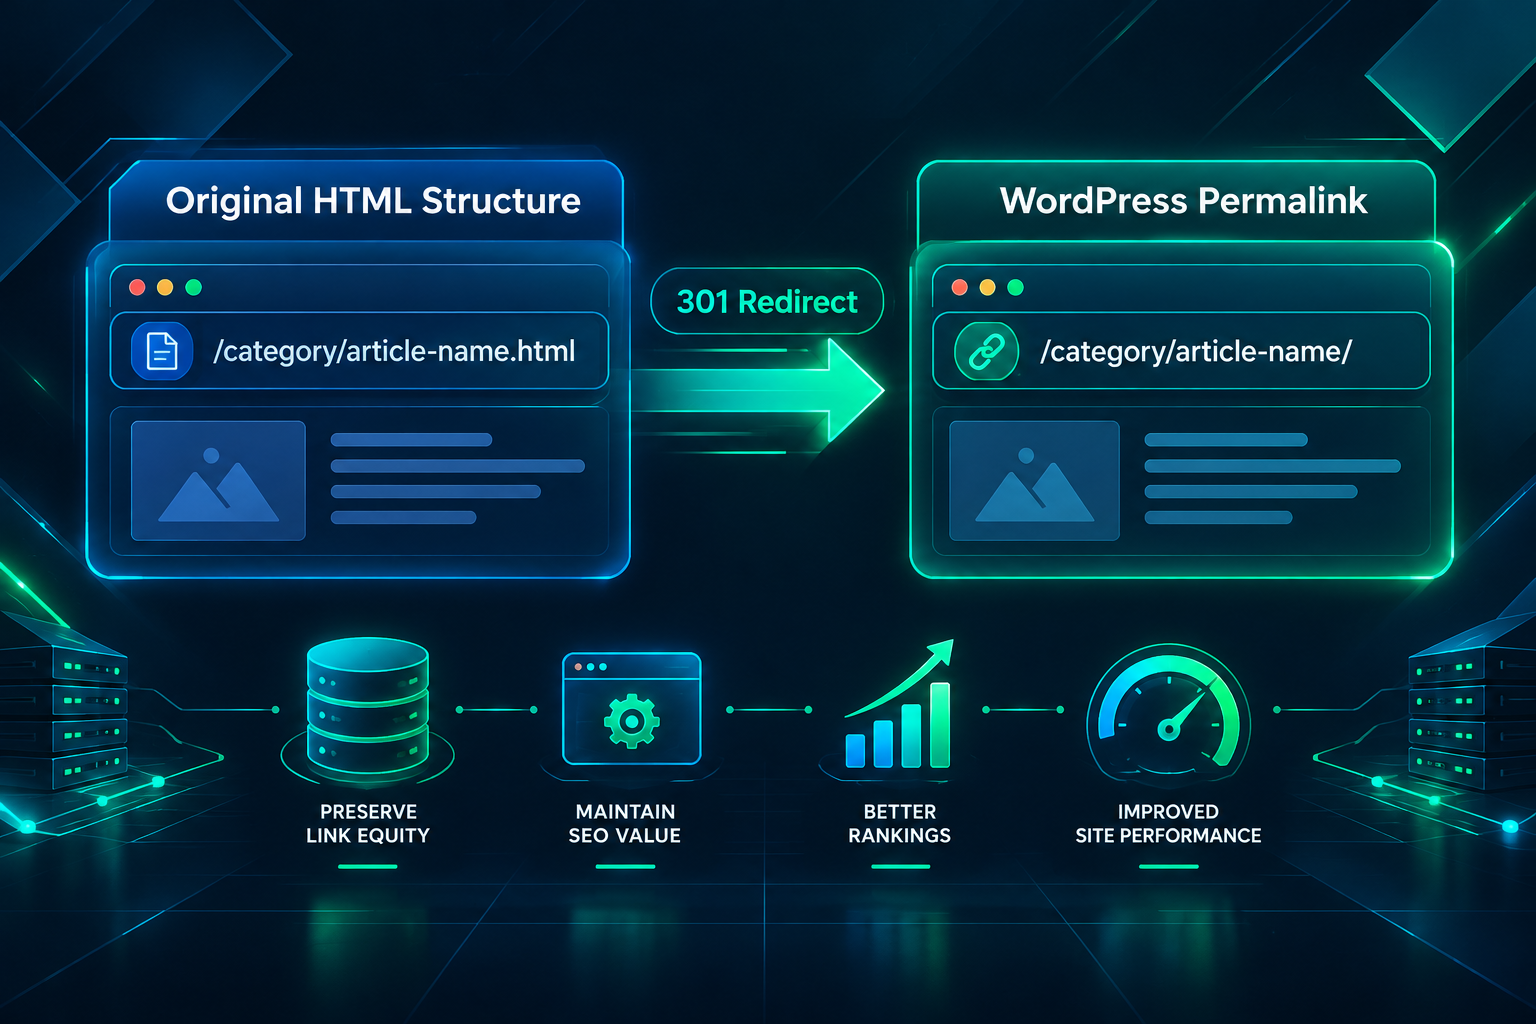
If the original HTML pages used paths like /topic/page-name.html, you can approximate this in WordPress using a custom permalink structure such as /%category%/%postname%/ and then manually setting each post’s slug to match the original filename without the .html extension. For pages where an exact match is not achievable, set up 301 redirects from the old path to the new WordPress URL using a redirect plugin or server-level rules in the .htaccess file. This preserves any link equity that may have accumulated on the original paths and prevents crawlers from encountering 404 errors when they follow links from external sources that reference the old URLs.
Avoid using WordPress’s default /?p=123 permalink format on a PBN site. Query-string URLs look machine-generated, provide no topical signal in the URL itself, and differ so dramatically from typical static HTML paths that the contrast is immediately visible to anyone reviewing the site’s structure.
Transferring Content from HTML to WordPress
With the permalink structure in place, begin transferring content from your HTML files into WordPress posts and pages. For each piece of content, create a new post or page in WordPress, paste the body text, and set the slug to match the original URL path. Assign each post to a category that reflects the original site’s topic structure — if the HTML site had a /reviews/ directory and a /guides/ directory, recreate those as WordPress categories and assign posts accordingly.
Preserve the original publication dates where you can determine them from the archived content. WordPress allows you to set a custom publish date for each post. Using dates that correspond to the original content’s publication period makes the site’s post history consistent with the domain’s age, which contributes to a more coherent content timeline. Do not fabricate dates that predate the domain’s actual registration or that are inconsistent with the archived content’s evident era.
During content transfer, clean up any HTML formatting artifacts from the archive. Wayback Machine recoveries often include broken image references, absolute links to the original hosting environment, and inline styles that do not render correctly in a WordPress theme. Replace broken image references with new images relevant to the content, update any internal links to point to the correct WordPress URLs, and remove inline styles that conflict with the theme’s stylesheet. The goal is a set of posts that read and render as naturally produced content, not as machine-recovered archive pages.
If the original site had fewer than ten pages of substantive content, consider supplementing the transferred pages with additional original posts on the same topic before placing any outbound links. A site with a thin content footprint — even one on an aged domain — may deliver less link equity than a site with a reasonable volume of topically relevant, readable content surrounding the placement.
Essential Plugin Configuration for a Converted PBN Site
A small set of plugins handles the most important technical requirements for a converted PBN site running on WordPress. You do not need a large plugin stack; unnecessary plugins add attack surface, slow the site, and create additional external requests visible in page source reviews.
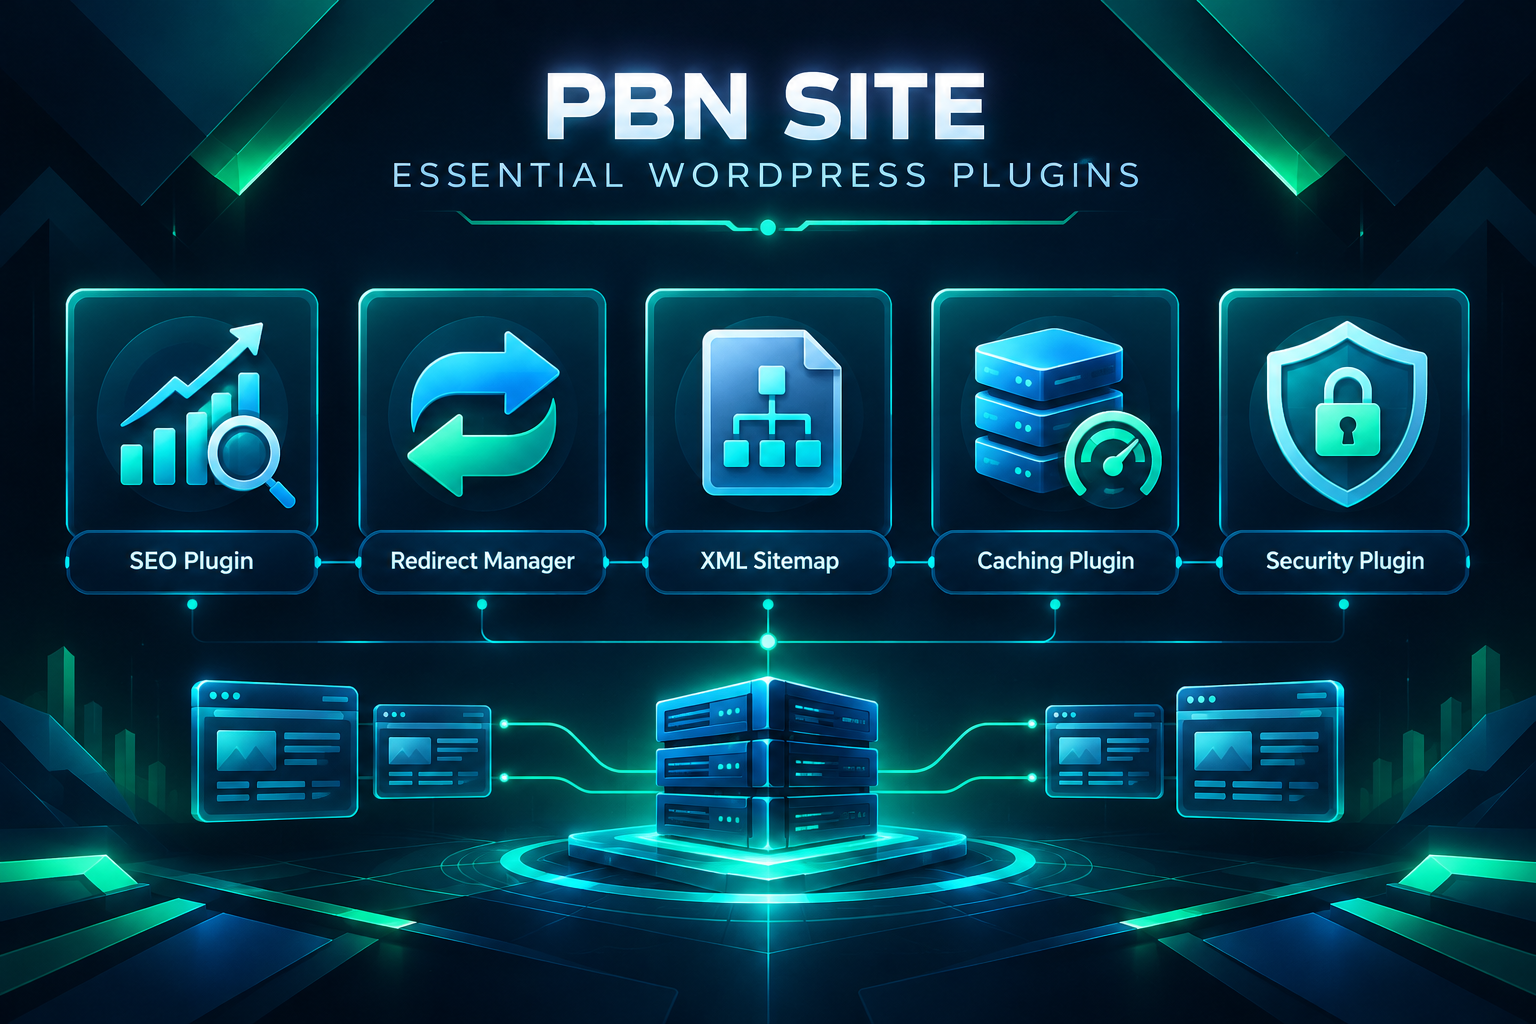
- SEO plugin: A plugin such as Yoast SEO or Rank Math lets you set custom meta titles, meta descriptions, canonical URLs, and robots directives for each post and page. Use it to write unique metadata for every transferred page and to ensure that no page is accidentally set to noindex during the migration.
- Redirect manager: A redirect plugin or the redirect functionality built into some SEO plugins lets you map old HTML paths to new WordPress URLs with 301 redirects, preserving crawl paths from any external links that reference the original URLs.
- XML sitemap: Most SEO plugins generate an XML sitemap automatically. Submit the sitemap to Google Search Console after the site is configured and content is in place. This helps crawlers discover all transferred pages rather than relying solely on internal links.
- Caching plugin: A lightweight caching plugin improves page load speed, which affects crawl efficiency and user experience signals. Choose one compatible with your hosting environment.
- Security plugin: Basic login protection and file integrity monitoring reduce the risk of the site being compromised and used for purposes that could harm the domain’s standing.
Avoid installing plugins that add visible badges, external tracking scripts, or third-party widgets that create obvious shared infrastructure signals across multiple sites in your network. Each PBN asset should have a minimal, independent technical footprint.
Internal Linking and Navigation Setup
Once content is transferred and plugins are configured, build out the site’s internal linking structure before adding any outbound links to your target pages. A WordPress site with no internal links between posts looks structurally incomplete to crawlers. Create a logical navigation menu that reflects the site’s topic categories, add contextual links between related posts within the body content, and ensure that every post is reachable from at least one other page on the site.
Internal linking on a PBN site serves two purposes. First, it distributes crawl equity across the site’s pages so that the post containing your outbound link is not the only page receiving crawler attention. Second, it reinforces the site’s topical relevance by connecting content on related subjects, which contributes to the domain’s perceived authority on its subject matter. A site where every post links only to the target page and nowhere else has a link pattern that is straightforward to identify during a manual or algorithmic review.
Indexing the Converted Site Before Placing Outbound Links
After completing the WordPress setup, allow the converted site to be indexed before you place outbound links to your target pages. Submit the XML sitemap through Google Search Console and, if relevant, through Bing Webmaster Tools. Check the Search Console coverage report after a few weeks to confirm that the transferred pages are being indexed and that no crawl errors or manual actions are present on the domain.
Placing outbound links on a site that has not yet been indexed means that the link equity transfer depends entirely on future crawls rather than on an established crawl pattern. Waiting for indexing also gives you the opportunity to identify and fix any technical issues — broken redirects, misconfigured robots.txt directives, or pages accidentally set to noindex — before those issues affect the placement’s effectiveness. The indexing period also allows the WordPress installation to accumulate some crawl history under the current configuration, which may make the transition from the original HTML site appear more gradual to search engine systems.
Placing Outbound Links After Migration
With the site indexed and the content structure in place, you can add the contextual outbound link to your target page. Place the link within the body of a relevant post, surrounded by content that is topically related to both the PBN site’s subject matter and the target page’s topic. A contextual link embedded in a well-written paragraph on a relevant subject is more likely to pass meaningful link equity than a link placed in a sidebar, footer, or on a page with no surrounding content.
Anchor text selection for the outbound link should reflect your broader anchor text strategy for the target page. Exact-match anchors can be effective but should be balanced with branded, partial-match, and natural-language anchors across the target page’s full backlink profile. The converted PBN site’s outbound link is one placement within a larger campaign, and the anchor text used on any single placement should be chosen in the context of the target page’s existing anchor distribution rather than in isolation.
After placing the link, monitor the post’s indexing status in Google Search Console to confirm that the page containing the link is being crawled and indexed. A placement on a page that is not indexed does not contribute to the target page’s backlink profile in any measurable way. If the post is not indexed within a reasonable period, investigate potential causes such as a noindex directive, a robots.txt exclusion, or a crawl budget issue on the domain.
Ongoing Maintenance of the Converted WordPress PBN Site
A converted PBN site on WordPress requires periodic maintenance to remain a functional and credible network asset. Update WordPress core, themes, and plugins regularly to avoid security vulnerabilities that could result in the site being compromised or deindexed. Add new content on the site’s topic at reasonable intervals — a site that receives no new content after the initial migration may eventually appear dormant, which can affect crawl frequency and the perceived freshness of the domain.
Monitor the site’s indexing status and backlink profile periodically using tools such as Google Search Console, Ahrefs, or Semrush. If the domain loses indexed pages, experiences a drop in crawl frequency, or shows signs of a manual action in Search Console, investigate the cause before adding further outbound links. Maintaining a clean technical setup and a consistent content presence gives the converted site the best conditions for delivering durable link equity to your target pages over time.
Frequently Asked Questions
Do I need to keep the original HTML files after migrating to WordPress?
You do not need to keep the HTML files live once the WordPress migration is complete and all redirects are in place. It is worth keeping a local backup of the original files in case you need to reference the original URL structure, content, or metadata during the migration or troubleshooting process.
Should the WordPress site use the same domain as the restored HTML site?
Yes. The purpose of restoring the HTML site is to leverage the domain’s history, crawl record, and any residual link equity. The WordPress installation should be on the same domain. Changing the domain defeats the purpose of the restoration and migration process.
How long should I wait before placing outbound links after the migration?
There is no fixed waiting period that applies to every domain. A reasonable approach is to wait until the transferred pages are confirmed as indexed in Google Search Console and no significant crawl errors are present. For most domains this takes several weeks, though the timeline varies depending on the domain’s crawl history and the hosting environment.
Can I add new content to the WordPress site that was not in the original HTML archive?
Yes, and doing so is generally beneficial. New content on the same topic expands the site’s topical footprint, increases the number of indexed pages, and makes the site appear more active. New posts should be consistent with the domain’s historical subject matter to maintain topical relevance.
Does the WordPress theme affect how the PBN site is perceived by crawlers?
Theme choice affects page load speed, the volume of external requests in the page source, and the overall HTML structure of the site. A clean, fast-loading theme with minimal external dependencies is preferable. Themes that share distinctive code patterns across multiple sites in a network can contribute to a detectable footprint, so choosing different themes for different PBN assets is a reasonable practice.
What should I do if some original HTML pages cannot be recovered from the archive?
If certain pages are missing from the archive, create original content on the same topics to fill the gaps. The goal is a coherent, topically consistent site rather than a perfect replica of the original. Missing pages that had inbound links from external sources should be covered by 301 redirects pointing to the most relevant available page on the WordPress site.
Making the Most of Your Converted PBN Asset
Converting a restored HTML PBN site to WordPress is a practical investment in the long-term usability of the domain. The migration process — auditing the HTML files, configuring WordPress permalinks to match original URL paths, transferring and cleaning content, setting up essential plugins, and allowing the site to be indexed before placing outbound links — creates a network asset that is easier to maintain, expand, and monitor than a static HTML installation.
The quality of the converted site ultimately determines the value of the placements it supports. A WordPress site with coherent topical content, a logical internal linking structure, clean technical configuration, and an independent hosting footprint is better positioned to deliver meaningful link equity than a hastily converted site with thin content and unresolved technical issues. Taking the time to complete each stage of the migration properly gives the domain the best conditions for functioning as a durable, productive part of your private blog network.
If you are building or expanding a private blog network and want guidance on domain selection, placement quality, or backlink packages suited to your target pages, PBN Backlinks Service can help you assess your requirements and identify the right approach for your campaign.